If you’ve ever had to help friends or relatives with computer problems over the phone this will help you get them out of you hair faster. Ultra VNC SC lets you control a users desktop without having the user do anything except double click a file. Here’s how:
To set up remote support you need to do a few things
- Get a dynamic dns name.
- Set up your firewall
- Configure the program
Get a dynamic DNS Name
- Now to get to your computer you can use the IP the ISP has assigned you. Problem: Your ISP will more than likely use DHCP to assign you an IP so at any given time you may not know your current IP. Solution: Dynamic DNS! Go to http://dyndns.org or http://tzo.com or http://deerfield.com or any other dynamic DNS site. In this example, I use DynDNS.org.
- Sign up for an account (free) and create a host name that you will use to reference you computer. Ex. homepc.homeip.net (one of the several subnets available).Create a new host entry under Host Services. The site will automatically detect the IP that you are currently accessing the site from so sign in from the place you want to connect to. I.e. your house.
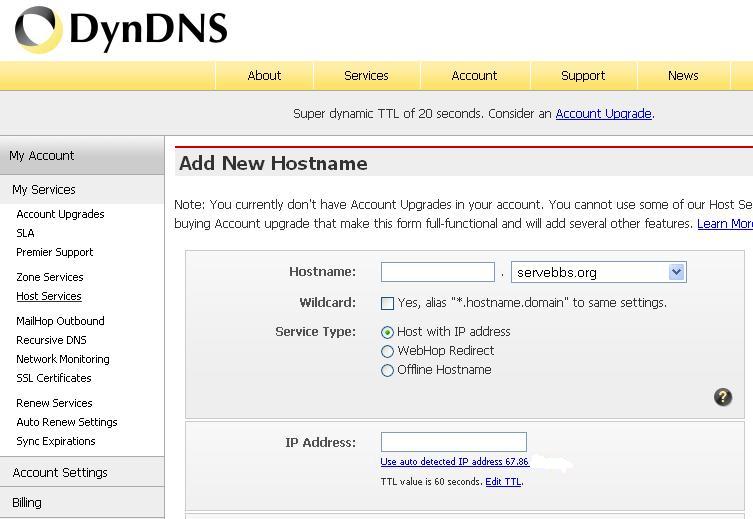
This will maintain your current IP info as a global internet address. When every your IP changes you will need to login into DynDNS and update the IP registed. Newer routers have a Dynamic DNS feature which will let you automatically update DynDNS whenever your IP changes. The other option is to use a DNS Update client that automatically updates your register IP from your PC. These clients are available on the DynDNS site.
Set up your firewall
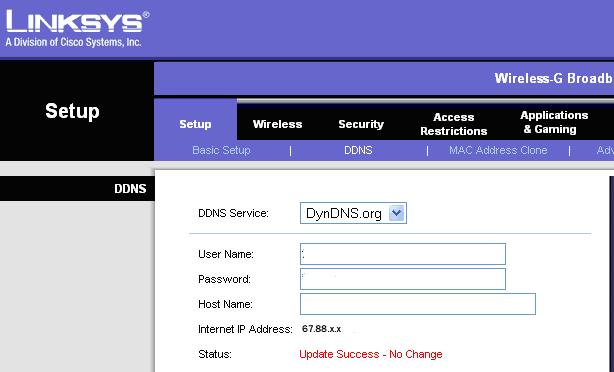
For this example I am using a Linksys router. If you are using a software firewall like Zone Alarm or anther hardware firewall / router please consult your user manual.
- Login to your router (usually http://192.168.1.1). Click on Applications & Gaming under the Port Range Forward.
On older an older Linksys it would be under Advanced tab then the Forwarding tab. You will see a similar page.
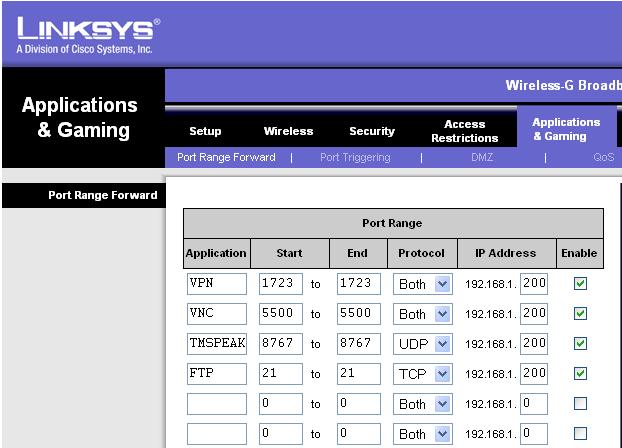
- In the application box put VNC. Put 5500 in both the Start and End box. Choose Both for the protocol. For the IP address enter the IP of the computer that you will be using for the remote support.
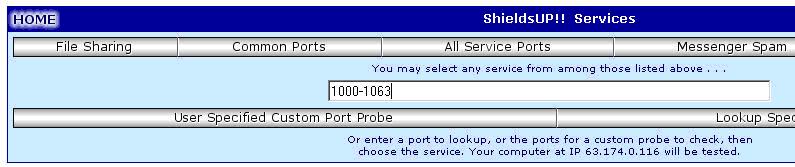
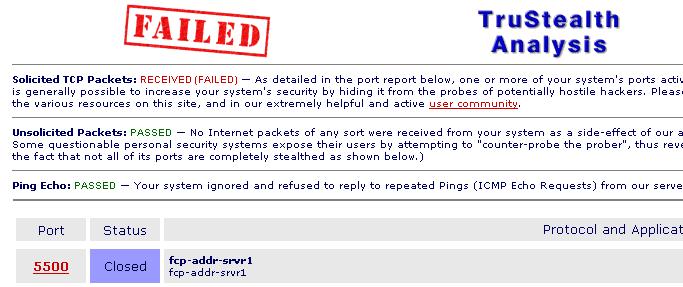
- To check if the port is now open go to go to http://www.grc.com and click on the Shields Up link or click https://grc.com/x/ne.dll?bh0bkyd2 . This will let you scan your router/firewall port from an external source.
- When you get to the Shields Up page, enter 5500 in the box and click “User Specified Custom Port Probe. You will also see some other options such as Scan Common Ports and All Service Ports feel free to experiment.
If the ports show up as Stealth then either you mis-configured your router or your ISP is blocking these ports. In most cases, you will see the ports listed as Closed.
If you see ports listed as OPEN this means some service / application responded to the port probe request! You will see how this work later.
Setup VNC SC
UltraVNC SC allows you to create a custom executable that the end user will run that allows you to remotely control their computer. Don’t worry tin-hat people you need to confirm the remote control of the computer so it can’t be used maliciously.
- Download the custom.zip file from http://www.uvnc.com/addons/singleclick.html
- Extract the files to a directory on your computer.
- Edit the helpdesk.txt in the directory that you extracted.
- Modify the first [HOST] entry. Replace the IP address with the Dynamic DNS host name that your registered in the first part of this tutorial it should something like Internet support -connect homepc.homeip.net:5500 –noregistry
- You can modify the other parameters if you want. They control some text and behavior in the application. See the site for details.
- Save the helpdesk.txt and zip up all the files in that directory to a single file like remote.zip. All the files must be named exactly as they are when first downloaded. NOTE: The name of the zip file will be the name of the executable that the user will click on when we are done.
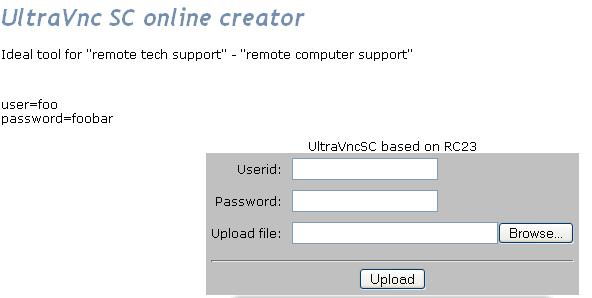
- Go to http://www.uvnc.com/pchelpware/creator/index.html to use the online creator tool on the UlraVNC website.
- Upload the zip file using userid = foo and password = foobar

- Download the file generated. This will be given to the user who’s computer you want to remotely control
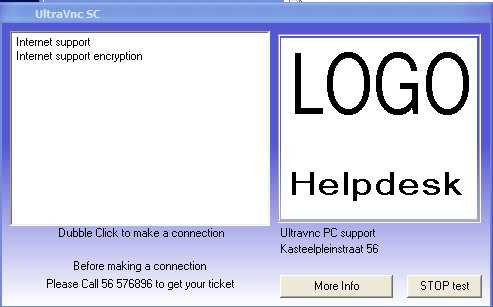
- When the user runs the executable they will see the below interface and they will need to click “Internet support” in the box on the left side of the application.
Making the connection
- Download UltraVNC (http://www.uvnc.com/download/index.html)
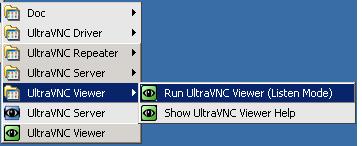
- From UltraVNC Menu -> Run UltraVNC Viewer (Listen Mode).Note: Make sure VNC is in listen mode before the user initiates the connection.
When the user initiates the connection you will see a message asking if you want to accept the connection. Once you click Yes you will be connected to the user’s computer and remotely control it.

Update: Since the writing of this article I have found other ways to setup remote control support. Please see
Remote Assistance / Remote Control revisited
[ad#default-ad]
We have been using GoToAssist and NTR Support, both are OK but certainly not worth paying for. I’m interested in using SimpleClick but need something reliable and easy for the customer to use. What are others opinions of this software in a IT Support environment?